API integration
If the Shopify or WooCommerce plugins don't fit your stack, connect Everspring directly via our REST API. This guide covers generating an API key, how inventory sync works, and how to request a sandbox environment.
Written By Bas den Hoed
When to build your own integration
Most retailers use our Shopify app or WooCommerce plugin and never touch the API themselves. Build a custom integration if:
You're on a platform that isn't Shopify or WooCommerce (Magento, custom ERP, headless commerce, etc.).
You need custom logic — routing rules, pricing engines, or data enrichment — that the plugins don't cover.
You want to sync data to a back-office or data warehouse next to your webshop.
What the API offers
REST API — standard HTTP endpoints with JSON payloads. No proprietary SDK required.
Product, inventory, and order endpoints — read the catalogue, push orders, receive stock updates.
Developer documentation — authentication, endpoints, request/response shape, rate limits, and best practices.
Sandbox environment — on request, so you can test without touching live data.
Tech support — techsupport@everspring.app for implementation questions.
Step 1 — Generate your API key
Log in to your Everspring retailer back-office.
Go to Settings → API Users.
Click Create New API User and give it a name that tells you what it's for (e.g. "Magento prod", "WooCommerce staging").
Click Save. Everspring generates an API key and shows it on screen.
⚠️ The API key is only visible once. Copy it into your password manager or secrets store immediately — if you lose it, you'll have to create a new API user and update every system that used the old key.
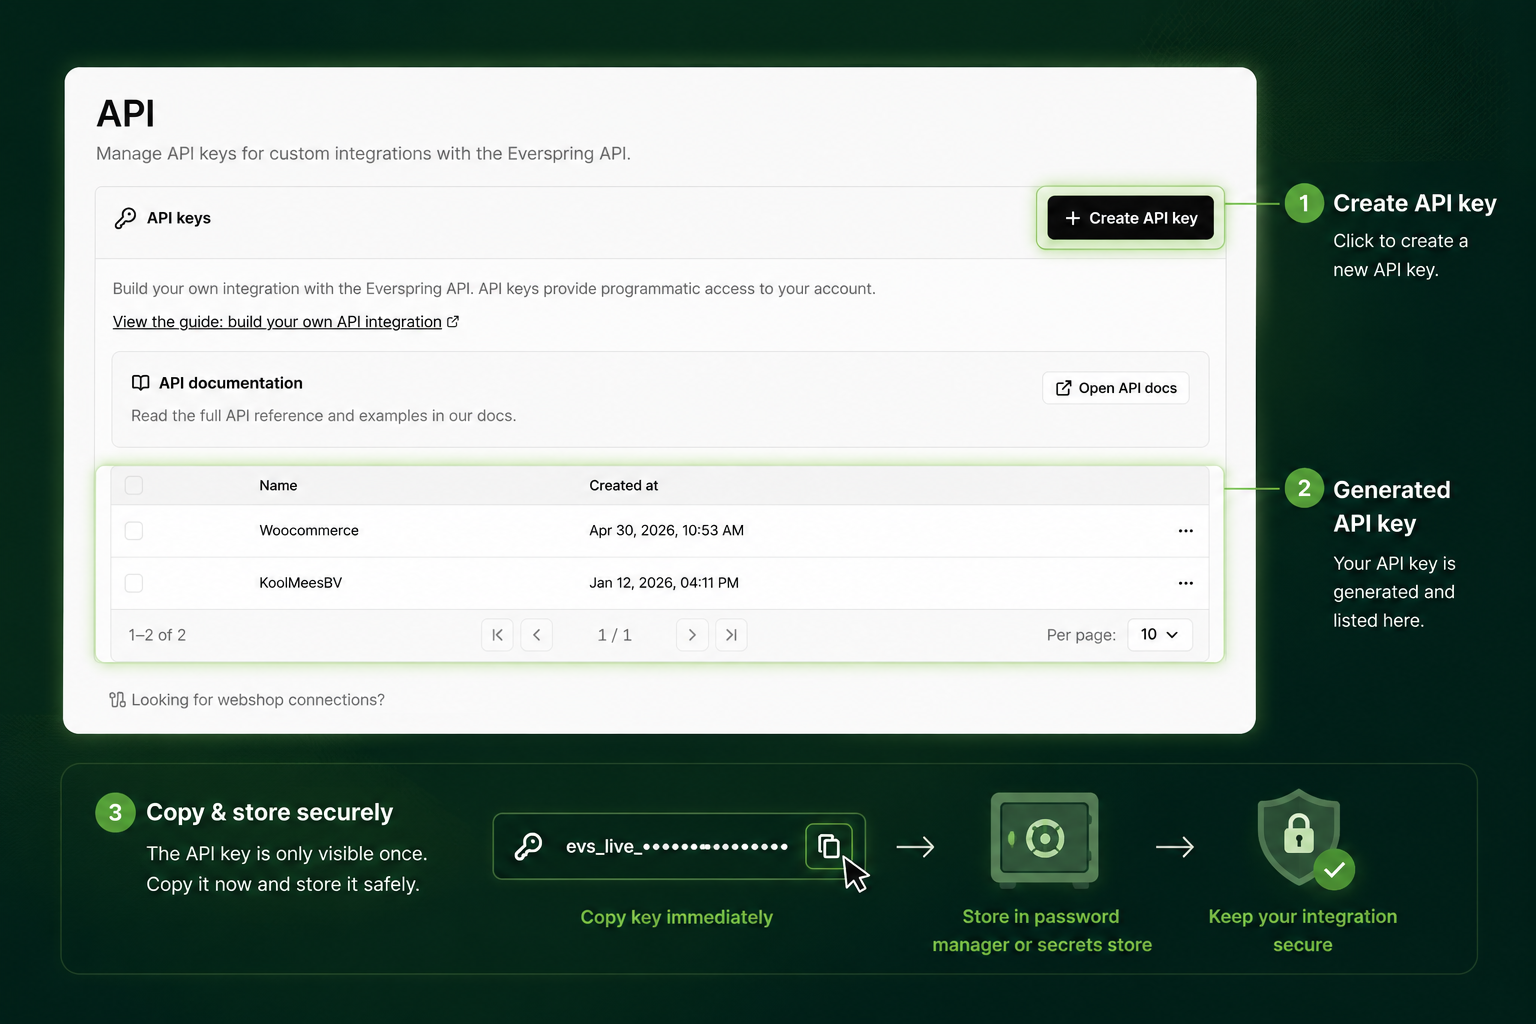
Step 2 — Store the key securely
Store the key as a secret in your integration's environment (1Password, AWS Secrets Manager, Vault, or your platform's equivalent). Never commit it to source control.
Give each downstream system its own API user — if one key leaks, you can revoke it without taking the others down.
You can manage and revoke existing API users from Settings → API Users, but you cannot recover a key that was never copied.
Step 3 — Connect and sync
Point your integration at the Everspring API using the key as the authentication header. The developer docs describe every endpoint; the usual starting order is:
Fetch the catalogue — retrieve products, variants, and metadata.
Map SKUs — every product you pull must be linked to an Everspring SKU on your side; the SKU is what stock updates and order forwarding key off.
Subscribe to inventory updates — stock is refreshed roughly every hour. Propagate it to your storefront so you don't oversell.
Push orders — forward orders containing Everspring SKUs for fulfillment.
How inventory sync works
Stock changes on the Everspring side propagate to your integration within roughly one hour.
Suppliers are responsible for keeping their stock current in Everspring. If a supplier's stock is wrong upstream, your integration will see that wrong value.
Design your storefront to trust Everspring as the source of truth for available stock — don't cache stock longer than your sync interval.
Request a sandbox
For most non-trivial integrations, we recommend building against a sandbox first. Email techsupport@everspring.app with a short description of your integration and we'll set one up. Sandboxes mirror the production API shape but are isolated from real orders and stock.
💡 Stuck during build? Email techsupport@everspring.app — include the endpoint you're calling, the request payload, and the response you got. That's enough for us to reproduce and help.