Disconnect or reinstall the WooCommerce plugin
How to cleanly deactivate the Everspring WooCommerce connector, reinstall a fresh copy, reconnect your API key, and re-link existing products via SKU.
Written By Bas den Hoed
When to do this
Use this process if you want to stop syncing with Everspring, switch to a different WooCommerce store, or reinstall a fresh copy of the plugin after corrupt files or a failed update.
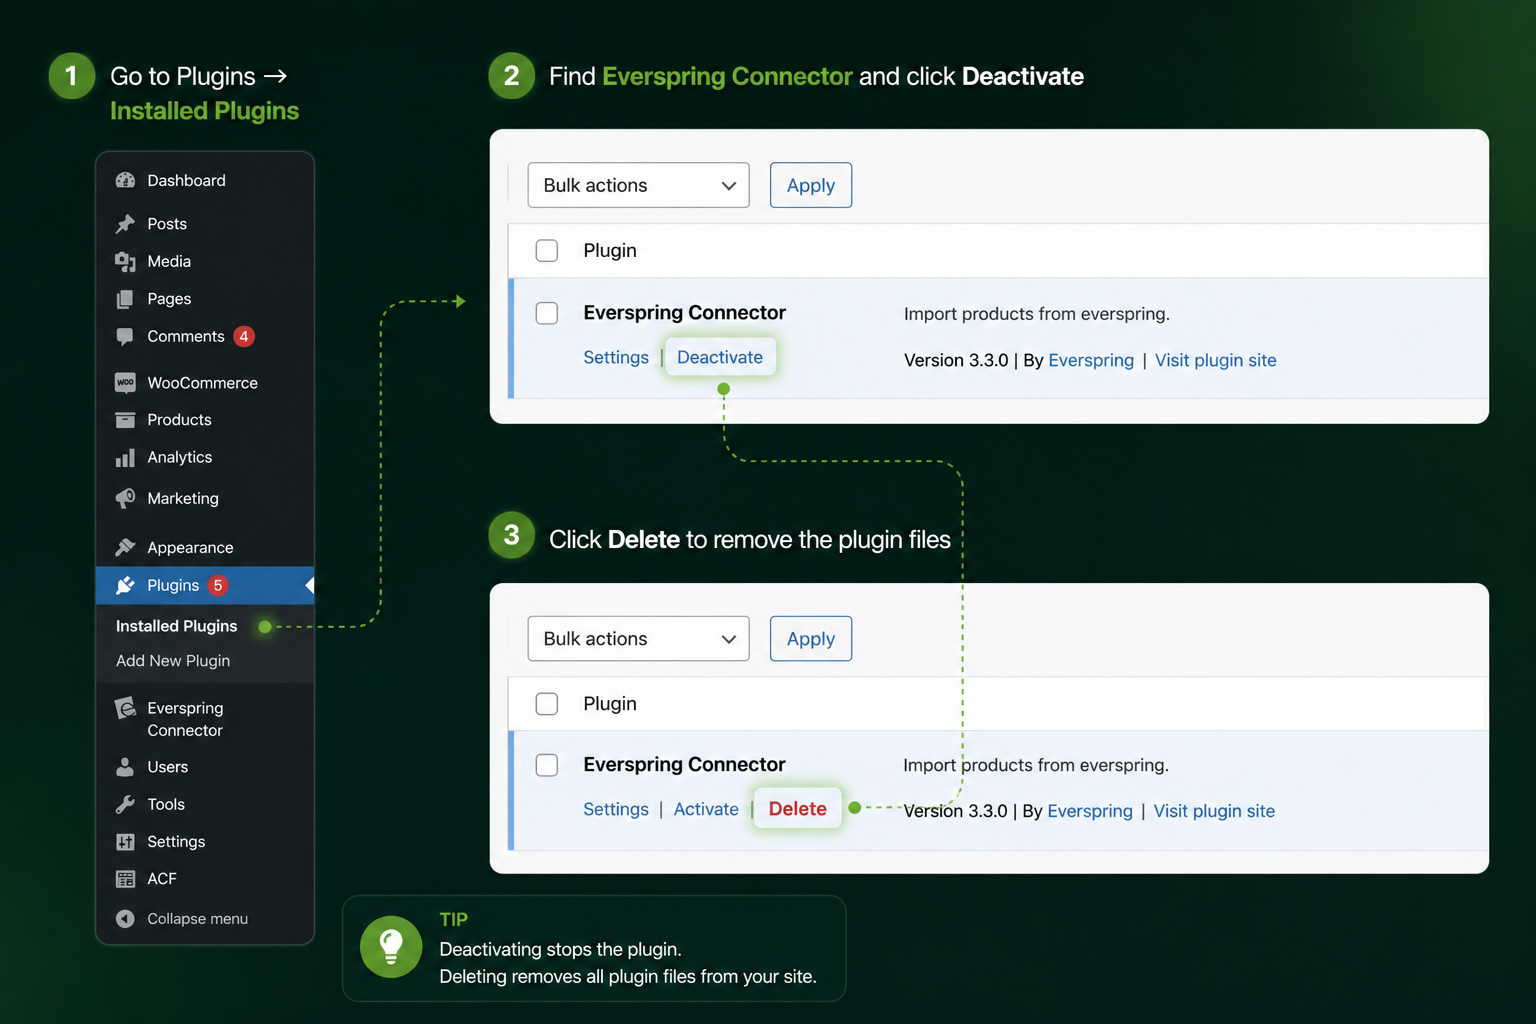
⚠️ Deactivating the plugin stops product updates immediately. Existing products stay in WooCommerce but stock and pricing will no longer refresh.
1. Deactivate and delete the plugin
In WordPress, go to Plugins → Installed Plugins.
Find Everspring Connector and click Deactivate.
Click Delete to remove the files.
2. Clean up (optional)
Products already in your store keep their data — they just stop syncing. If you want to remove Everspring products entirely, filter the product list by the Everspring Imported = Yes flag or by SKU prefix and bulk-delete.
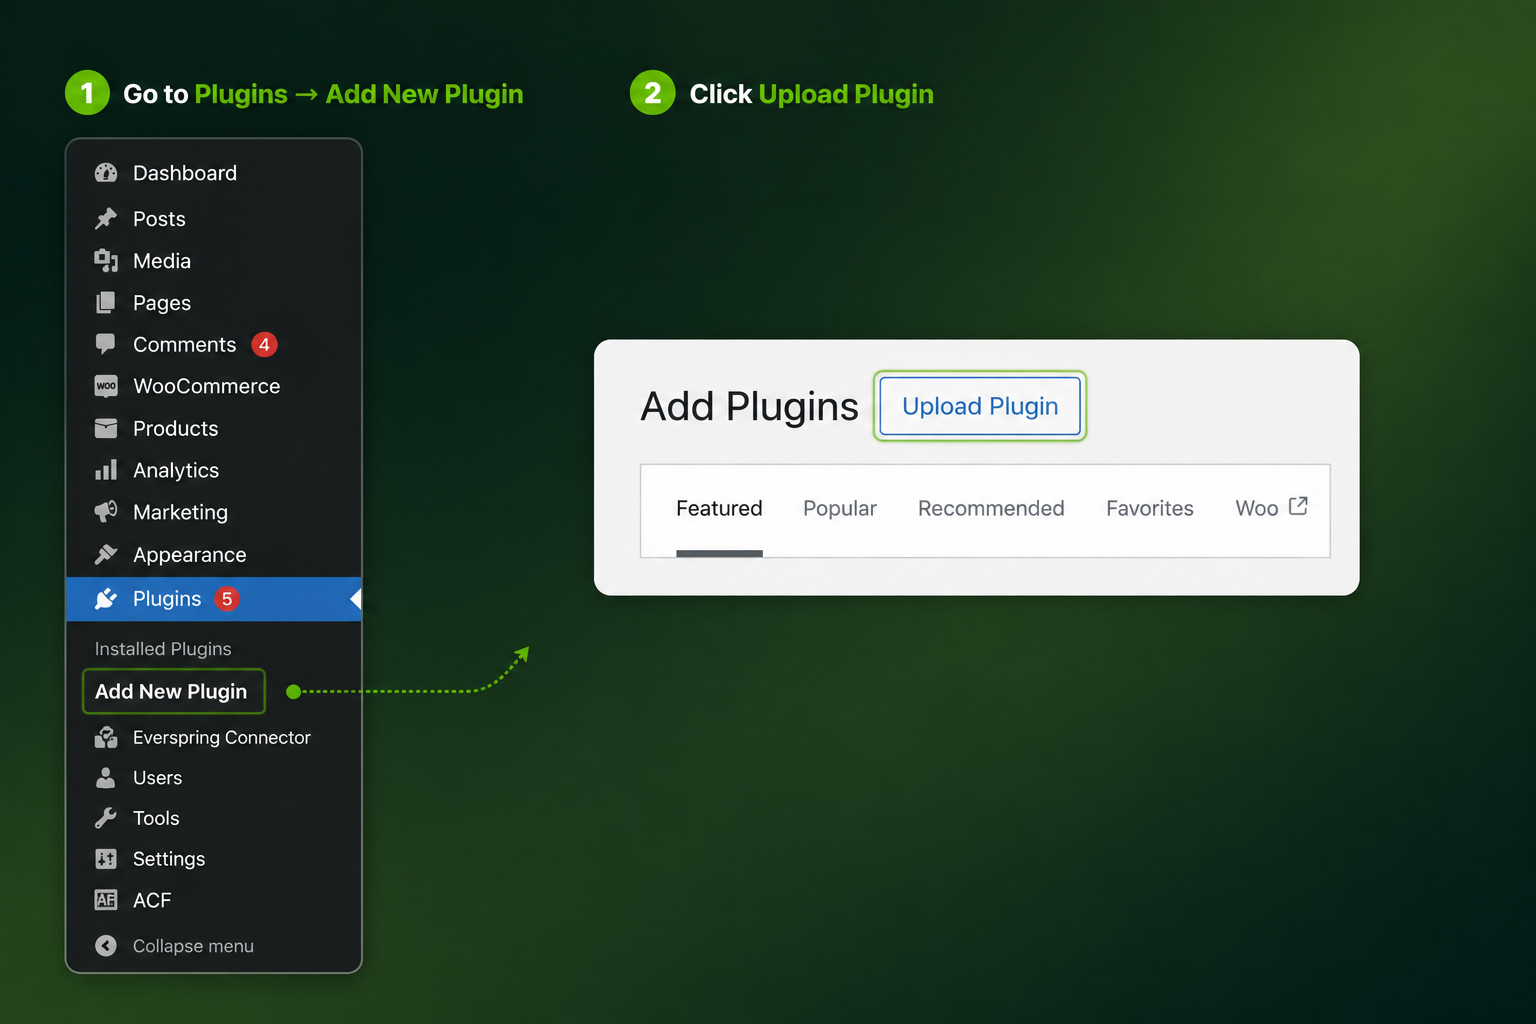
3. Reinstall with a fresh zip
Go to Plugins → Add New → Upload Plugin, select the ZIP, click Install Now, then Activate.
4. Reconnect your API key
In Everspring, generate a new API key if needed (see Generate your Everspring API key).
In WordPress, open the Everspring plugin Settings and paste the key.
Reapply your field-overwrite, image size, and order forwarding settings (see Install the WooCommerce plugin, step 4).
Click Save Settings.
5. Re-link existing products
The bind between Everspring and a WooCommerce product is held by two fields: the SKU and the Everspring Imported flag. After reinstalling:
If the SKU on each product still matches the Everspring SKU exactly, inventory starts updating again within the next sync cycle.
If SKUs don't match, the plugin creates new duplicate products on the next sync — fix the SKUs before that happens.
💡 Still seeing issues after reinstall? Run through Order troubleshooting — WooCommerce.