Activate your eWallet
Second step in Getting Started. Covers why the eWallet exists, activation, KYC verification, and first top-up.
Written By Bas den Hoed
Why the eWallet matters
The eWallet is the heart of how Everspring works. Once your webshop is connected, the flow is fully automatic:
A customer places an order in your shop.
Your webshop (Shopify, WooCommerce, or your API) forwards the order to Everspring.
Everspring routes it to the correct supplier.
The supplier is paid — instantly — from your eWallet.
The supplier ships; tracking flows back to your customer.
Without an activated eWallet, none of this happens. Orders cannot be routed to suppliers, suppliers cannot be paid, and the automation stalls. That's why we ask you to set it up before you start selling.
Beyond being the payment rail, the eWallet gives you three concrete advantages:
Instant supplier payments. No invoicing cycles, no delays. Orders ship the same day.
Full control over cashflow. You see your balance in real time and top up when you want, not on a fixed billing schedule.
One place for all money movement. Top-ups in, supplier payments out, refunds back in, VAT-free liquidity transfers — all visible in one dashboard.
Activating your eWallet is a three-part process: activate the wallet itself, verify your business details (KYC), and top up a starting balance.
Step 2.1 — Activate your eWallet
Log in at my.everspring.app.
Go to eWallet in the left-hand menu.
Click Activate eWallet — this creates your wallet account with our payment provider (OPP).
The wallet is now created but not yet operational. You'll need to complete verification before you can top up or pay out.
Step 2.2 — Complete KYC verification
To unlock full functionality, submit the following:
Bank account — required for withdrawals. Must be in your company's name.
Identity verification — ID document for the authorized representative.
Phone number — verified with an SMS code.
Ownership and business structure — UBO information (ultimate beneficial owners).
Why KYC? This is a legal requirement under EU anti-money-laundering rules (AMLD). The payment provider — not Everspring — performs the check. We don't store your ID document.
If we need more information
If any of the submitted details are incomplete or need clarification, you will receive an email at the address you used to register your account. Simply reply to that email with the requested documents or information, and we'll continue the verification from there.
Verification typically completes within one business day once all documents are submitted.
Step 2.3 — Top up your starting balance
Once verification is complete:
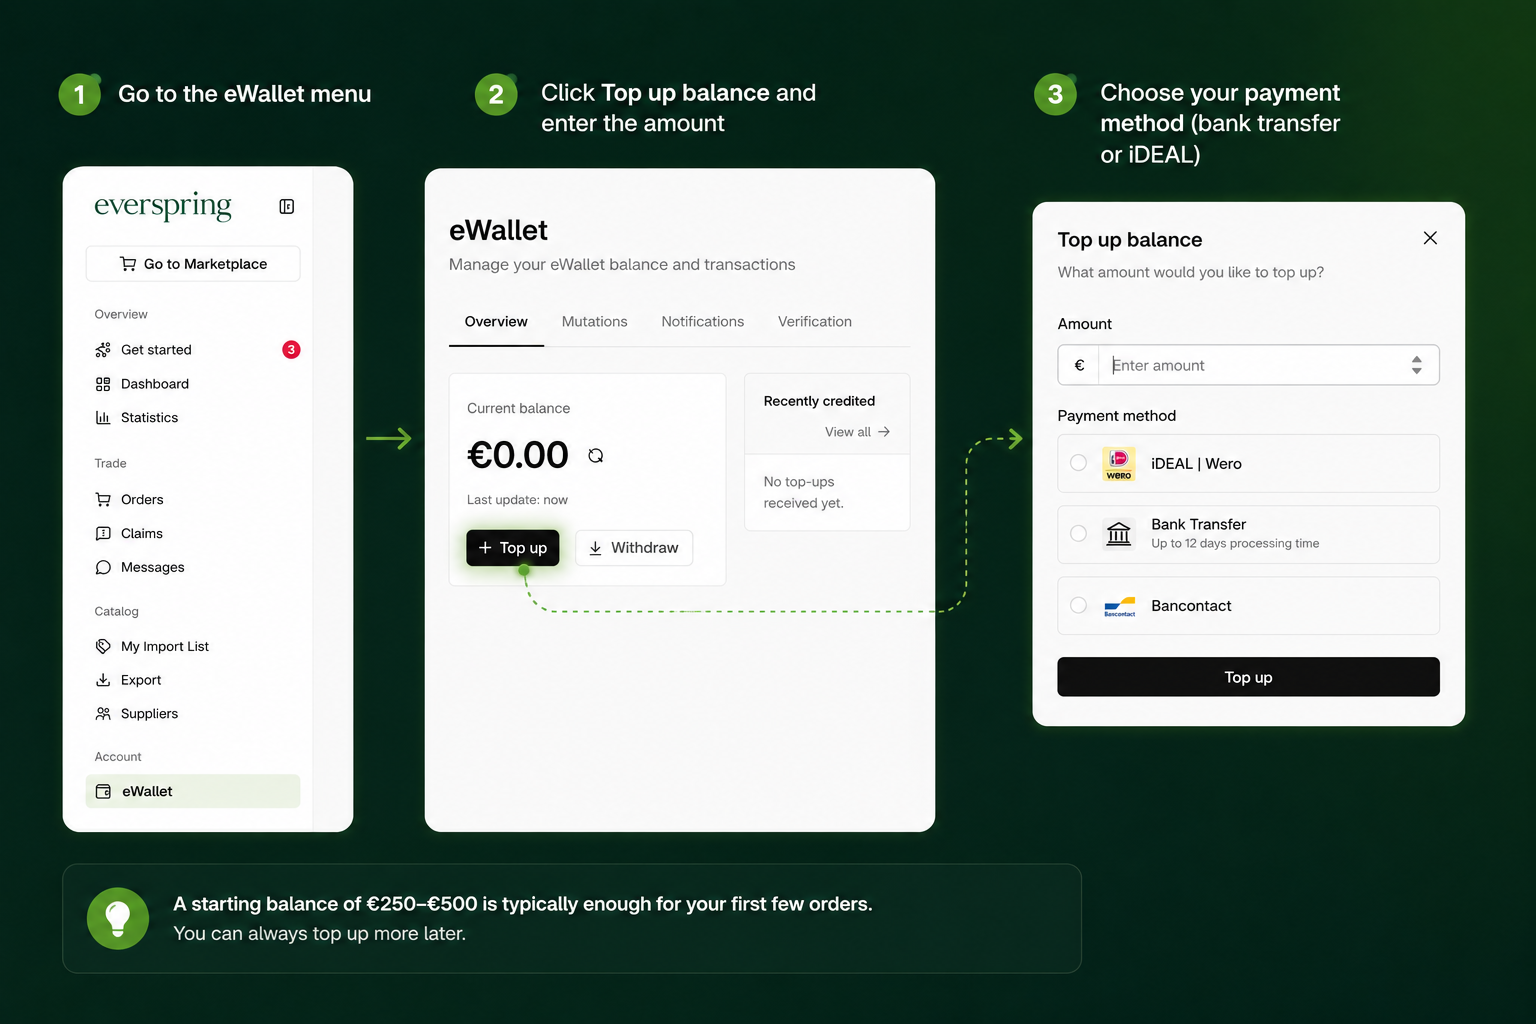
Go to the eWallet menu.
Click Top up balance and enter the amount you want to deposit.
Choose your payment method (bank transfer or iDEAL).
A starting balance of €250–€500 is typically enough for your first few orders. You can always top up more later.
Is a top-up an expense?
No. Topping up your eWallet is not an expense or a purchase — it's a balance sheet transaction. You're transferring funds from your company bank account to a wallet temporarily held by our payment provider. No VAT is applied, and you will not receive an invoice, because this is classified as a liquidity movement rather than a taxable transaction.
When a customer order is actually paid out to a supplier, that is the moment the expense is booked — and at that moment we do issue an invoice.
How to know your eWallet is ready
You're ready to move on when:
Your eWallet shows a positive balance in the dashboard
The KYC verification banner has disappeared
You no longer see a "pending wallet" warning on new orders
Once you see all three signals, your shop is ready to receive live orders.
Next up → Step 3 — Connect your webshop